

USB-C PD Multi-Rail Power Supply Unit for Atari ST/E and MegaST
USB-C PD Multi-Rail Power Supply Unit for Atari ST/E and MegaST
Couldn't load pickup availability
A modern USB-C PD PSU for your Atari ST, STE or Mega ST
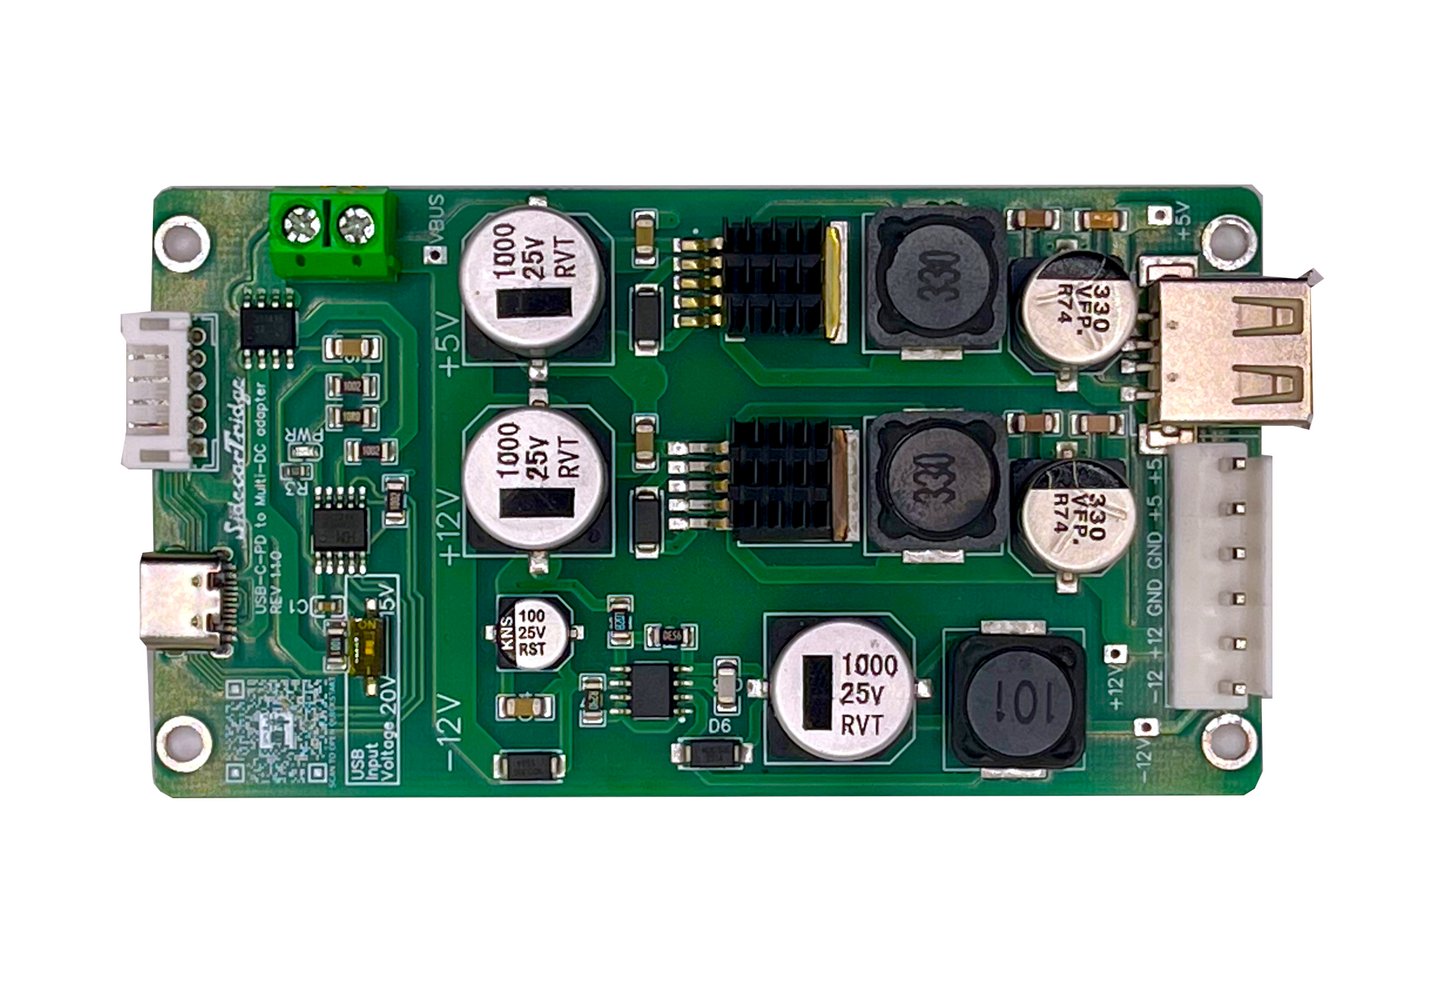
The SidecarTridge USB-C PD Multi-Rail PSU replaces the aging original power supply with a modern USB-C Power Delivery board. Power comes in through a panel-mounted USB-C jack instead of the legacy AC inlet, so only low-voltage DC ever enters the case. It delivers clean and stable +5V, +12V and -12V rails sized for the ST, STE and Mega ST mainboard plus SidecarTridge add-ons, through a solderless harness that plugs straight into the factory connectors. Quiet, cool and safer than a 40-year-old PSU running on dried-out capacitors.
Ships from Spain. For the Atari ST, STE and Mega ST.
Key features
- Solderless installation: plug-in harnesses replace the original PSU connectors. No soldering on the motherboard, no chassis modifications, no permanent changes.
- USB-C PD multi-rail output: clean and regulated +5V, +12V and -12V rails sized for the Atari ST family and any SidecarTridge add-ons sharing the bus.
- Low-voltage DC inside: AC mains stays in the charger. Inside the case there is only USB-C PD low-voltage DC, no live wires and no high-voltage capacitors.
- Integrated +5V USB-A output: a regulated +5V USB-A port on the board powers the Multi-device, ACSI2STM, Gotek or any other accessory without loading the Atari motherboard rails.
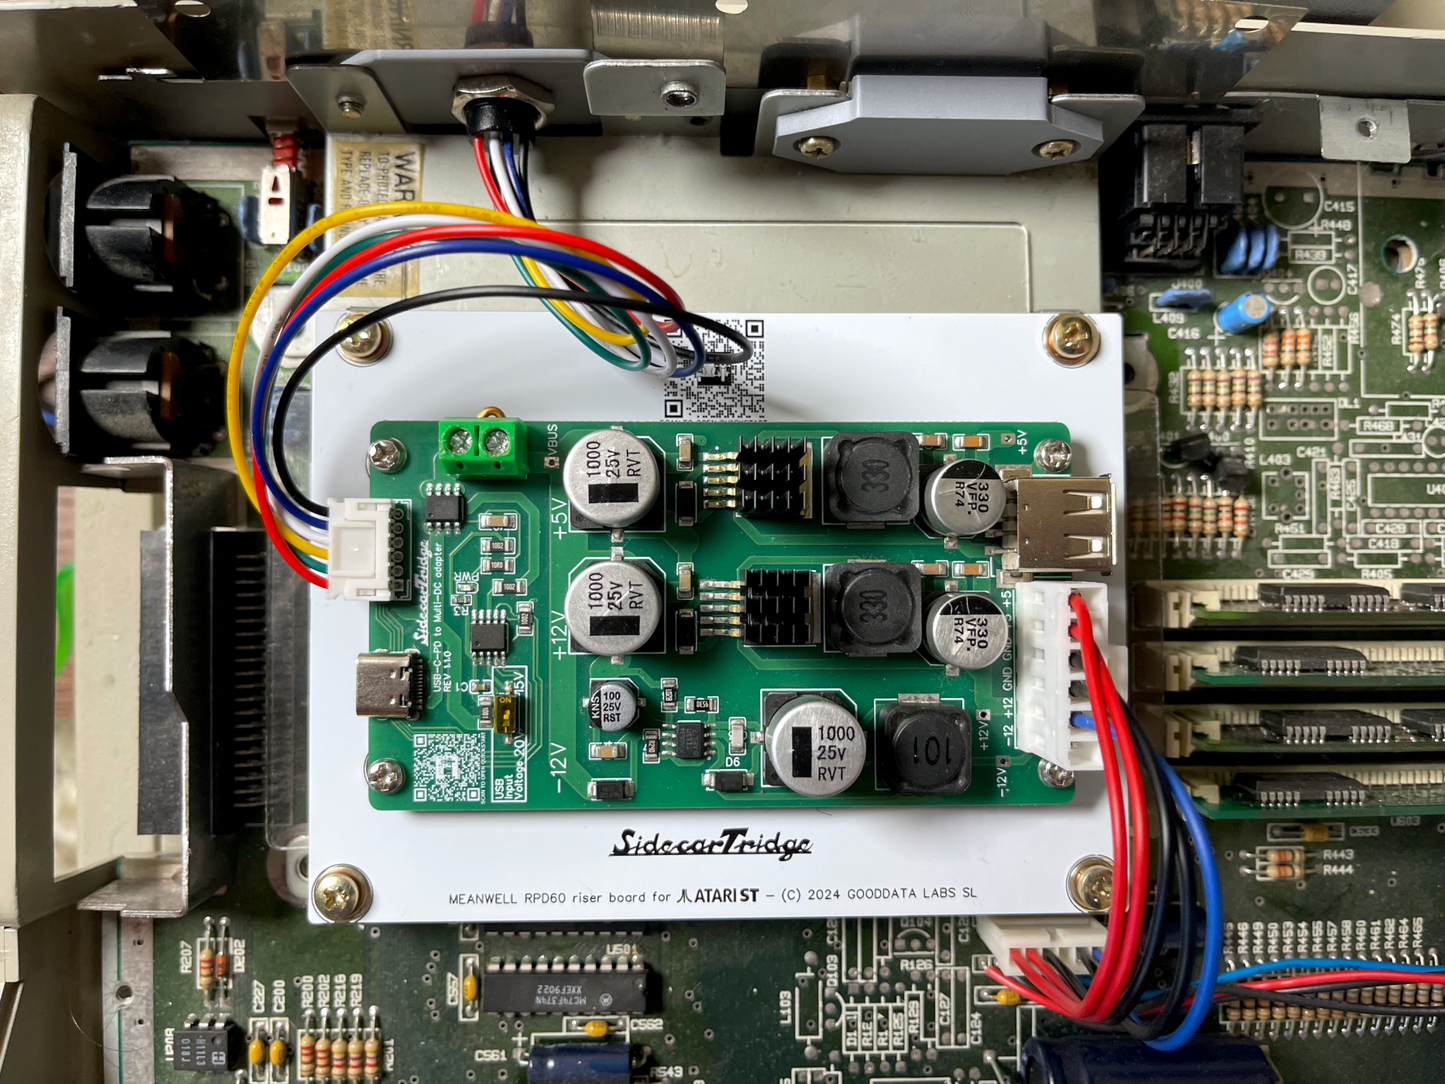
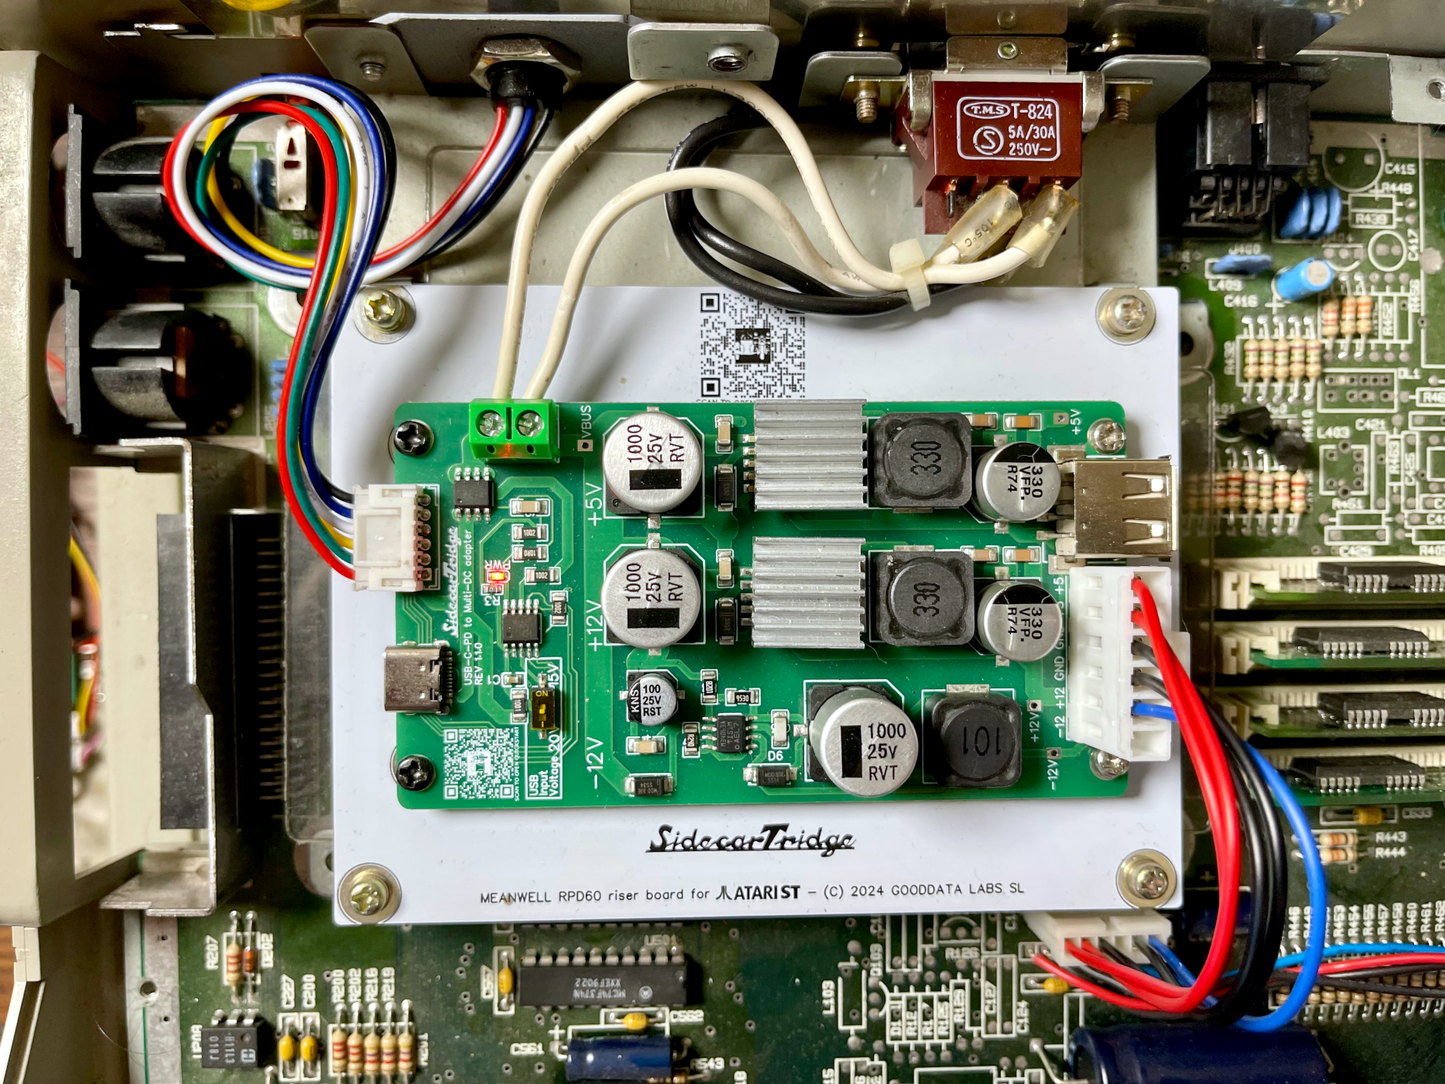
- Fits the original PSU bay: riser PCB and brackets line up with the original mounting points. It shares the mechanical layout with the Mean Well PSU Kit. No bent metal, no plastic surgery.
- Replaces AC inlet and switch: 3D-printed panels replace the legacy AC inlet and power switch with a panel-mounted USB-C PD jack. The machine ends up looking stock from the outside.
Kit contents
The USB-C PD Multi-Rail PSU kit includes:
- Riser PSU PCB sized to the original PSU mounting points. It shares the mechanical layout with the Mean Well PSU Kit.
- SidecarTridge USB-C PD Multi-Rail board with +5V / +12V / -12V output and a regulated +5V USB-A port.
- 3D-printed AC inlet cover with a panel-mounted USB-C PD receptacle and JST-PH 2.0 terminated cable.
- 3D-printed power switch cover for the original switch hole.
- Motherboard harness: JST-VH 3.96 mm 6-pin to TE 171822-6 6-pin, 10 cm.
- 8 x M3 4 mm Phillips screws for the riser and board.
- 6 x M3 nuts for the mounting hardware.
You provide the USB-C PD charger and the USB-C to USB-C cable.
Installation overview
- Unplug the Atari from the wall and open the case.
- Unscrew the metal RF shield to reach the PSU bay. On ST and STE only the PSU portion needs to come off. On the Mega ST the full shield is removed. Both go back on at the end, so the machine ends up in its stock configuration.
- Remove the original PSU and keep the screws, you will reuse the bay.
- Mount the USB-C PD board on the riser PCB with the provided M3 hardware, then bolt the assembly into the original PSU bay.
- Replace the AC inlet and power switch covers with the 3D-printed parts. The USB-C PD jack is now panel-mounted.
- Wire the motherboard harness between the new board and the existing motherboard connector, and route the JST-PH 2.0 cable from the USB-C jack to the board.
- Close the case, plug in your USB-C PD charger, and power on.
Step-by-step photos and tips live in the Quickstart guide and the documentation.
Compatibility
| Atari model | Status |
|---|---|
| Atari ST, 1040 STF, STFM | Supported |
| Atari STE | Supported |
| Atari Mega ST | Supported |
| Atari Mega STE | Not supported |
| Atari TT | Not supported |
| Atari Falcon | Not supported |
| Atari 520ST (external brick) | Not supported |
The Atari 520ST short uses an external power brick instead of an internal PSU. For that machine, the External USB-C PD PSU is the right product.
USB-C PD charger requirements
You bring your own charger. Pick a unit that meets all of the following:
- Power: 60 W output, recommended 15 V / 3 A and 20 V / 3 A or higher.
- Standard: USB-C PD 3.0 compliant. PD 3.1 chargers with Extended Power Range (EPR) may not negotiate correctly even when they advertise PD 3.0 fallback.
- Profiles: must expose both 15 V and 20 V PD profiles. Chargers limited to QC, PPS only, or a single USB-C profile are not supported.
- Cable: certified USB-C cable rated for 60 W or 100 W. You can grab one in our store: USB-C to USB-C cable.
- Multiport chargers: the chosen port must deliver the full 60 W. Many GaN bricks de-rate the second port.
A vetted list of chargers known to work lives in the documentation.
Specs
- Weight: 150 g (kit, packaged).
- DC output: +5V, +12V, -12V (motherboard rails).
- Auxiliary output: regulated +5V USB-A port on the board.
- Input: USB-C PD 3.0, 60 W, 15 V and 20 V profiles.
- Motherboard connector: JST-VH 3.96 mm 6-pin to TE 171822-6 6-pin harness, 10 cm.
- Internal DC harness: JST-PH 2.0 from the panel-mounted USB-C jack to the board.
Frequently asked questions
Which Atari models are supported?
Atari ST (520ST internal, 1040 STF, STFM), STE and Mega ST are all supported. Mega STE, TT, Falcon and the 520ST external power brick are not. For the 520ST short with an external brick, use the External USB-C PD PSU.
What does the +5V USB-A output do?
The board exposes a regulated +5V USB-A port. Use it to power SidecarTridge Multi-device boards, ACSI2STM, Gotek or other accessories without loading the Atari motherboard rails.
Can the PSU harm my computer?
Once correctly wired and seated, the rails are well inside the Atari ST family specs, and you are running on a modern board instead of dried-out 40-year-old capacitors. The risk is in the wiring on your side: follow the quickstart, double-check the motherboard harness orientation, and use a certified USB-C cable.
Do I need to solder anything?
No. The motherboard side is plug-and-play through the supplied harness. The DC side from the USB-C jack to the board uses a pre-terminated JST-PH 2.0 cable.
What USB-C PD power adapter do I need?
A 60 W USB-C PD 3.0 charger with both 15 V and 20 V profiles, plus a certified USB-C cable. Avoid unbranded chargers, PD 3.1 EPR units, and multiport bricks where the chosen port de-rates below 60 W. Most modern laptop and tablet chargers from reputable brands meet these requirements.
Does it run on PD 3.1 chargers?
Some PD 3.1 chargers with Extended Power Range (EPR) do not negotiate correctly with this board even when they advertise PD 3.0 fallback. Stick to PD 3.0 chargers from the tested list when in doubt.
Good to know
- This is a homebrew product built for hobbyists who are comfortable opening the case and already own, or are happy to buy, a quality USB-C PD charger. It is not a sealed appliance.
- If you prefer an industrial-grade AC PSU inside the case, look at the Mean Well PSU Kit instead.
- For the 520ST short with an external power brick, use the External USB-C PD PSU.
New to the device? Follow the quickstart guide.
Share

- 5 stars: 2 (67%)
- 4 stars: 0 (0%)
- 3 stars: 0 (0%)
- 2 stars: 0 (0%)
- 1 star: 1 (33%)
It won't work. I don't no why. Use several original PD Powersupply with 20 Volts and different known good USB C-C cable. But the little Power LED on the converter don't lid and the ST will not power on. With the original Power Supply the 1040STf runs perfect. As i am a technician, i measure the out going voltage, but there is nothing and the Power on the PD-Side is still on 5 Volt. But i thing this is not the normal condition. If it work, it will be a very nice solution to replace a defective supply
My Atari STE now works as a wonder!
A great power supply upgrade for Atari ST/E and MegaST. Compact, modern and reliable, using USB-C PD to replace the original PSU. Highly recommended for a cleaner and more convenient setup!